This is a technique that will show how to punch up your character lights and symbols if you want to make sure they don’t get covered by, or lost in the shadows. When it comes to character symbols and insignias, it can make them look more bold, like the normal rules of lighting don’t apply to them.
In this image, I’ve used the “ambient texturing” that I went over in great detail in my Ambient Method post/video. If you’re not familiar with it, then please check that post out to get up to speed.
A barebones Ambient Method refresher: Using the 3Delight rendering engine (not iRay) – we turn off all the other surface channels except for Ambient (and opacity) and then load our colors and textures in there. We follow it with a “shadow” render using the specular channel, and even made some rudimentary lines with the Daz Cartoon Shader. We took the three renders and composited them in Photoshop to make the image.
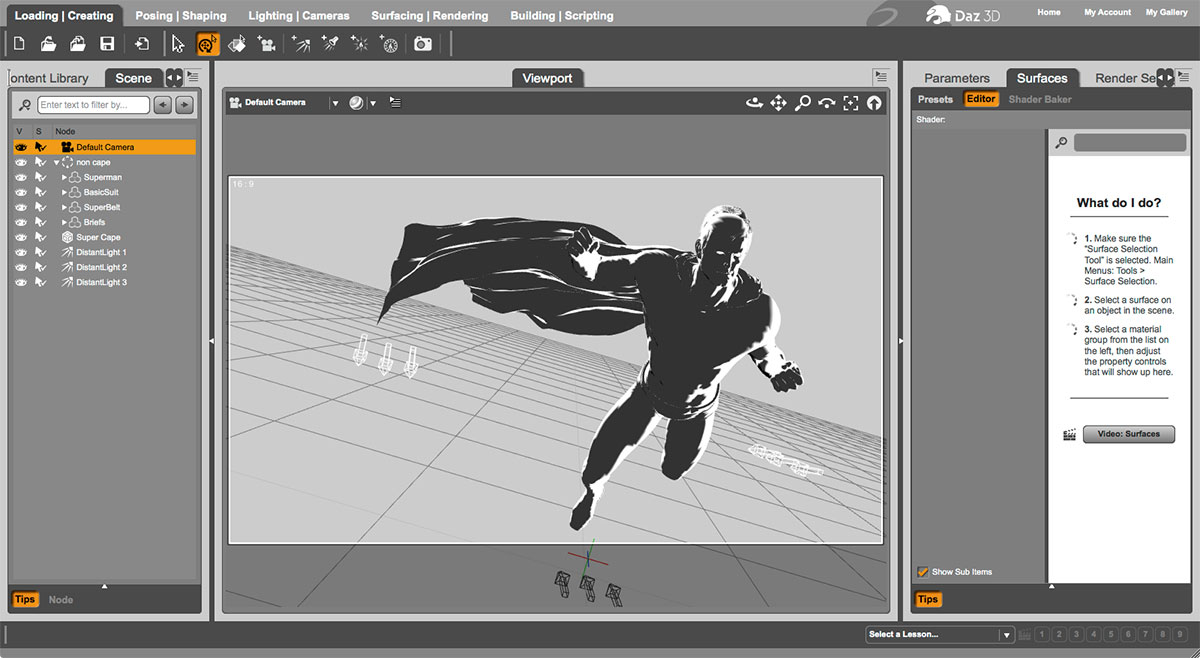
Ambient Render
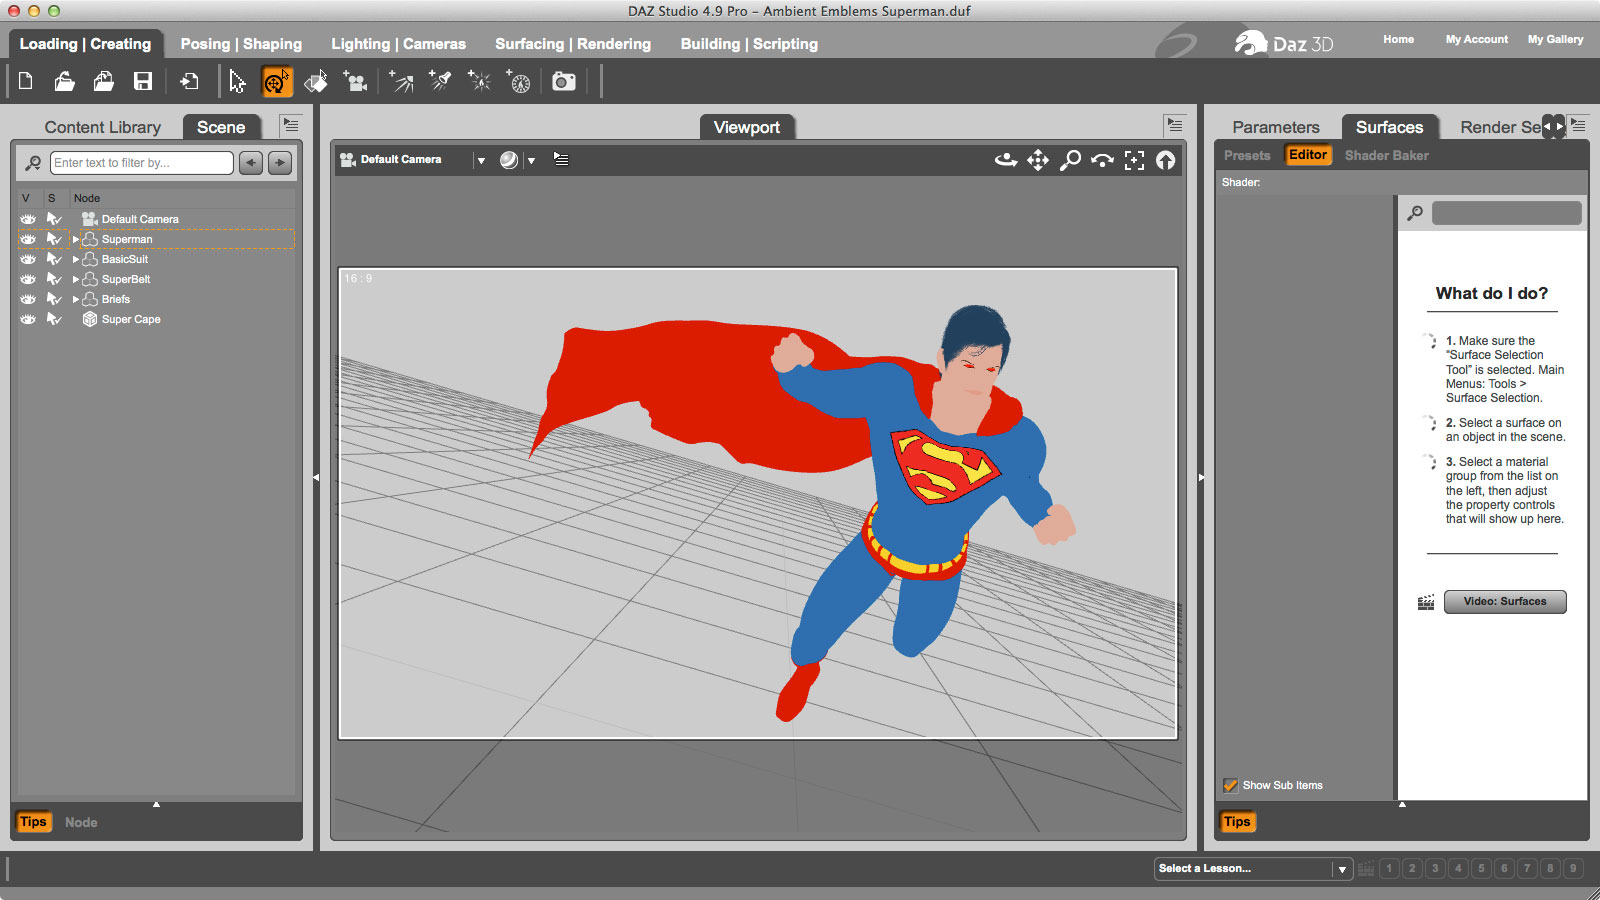
Daz Studio view set up for the ambient base render.
So in this render, I had simply used a Genesis Michael 5 Hero that I modified a bit, along with the Super-Suit, Super-Cape, and some other props to fill out the figure. I’ll leave a list of all the props at the end.
Here’s a look at the texture applied to the Super Suit:
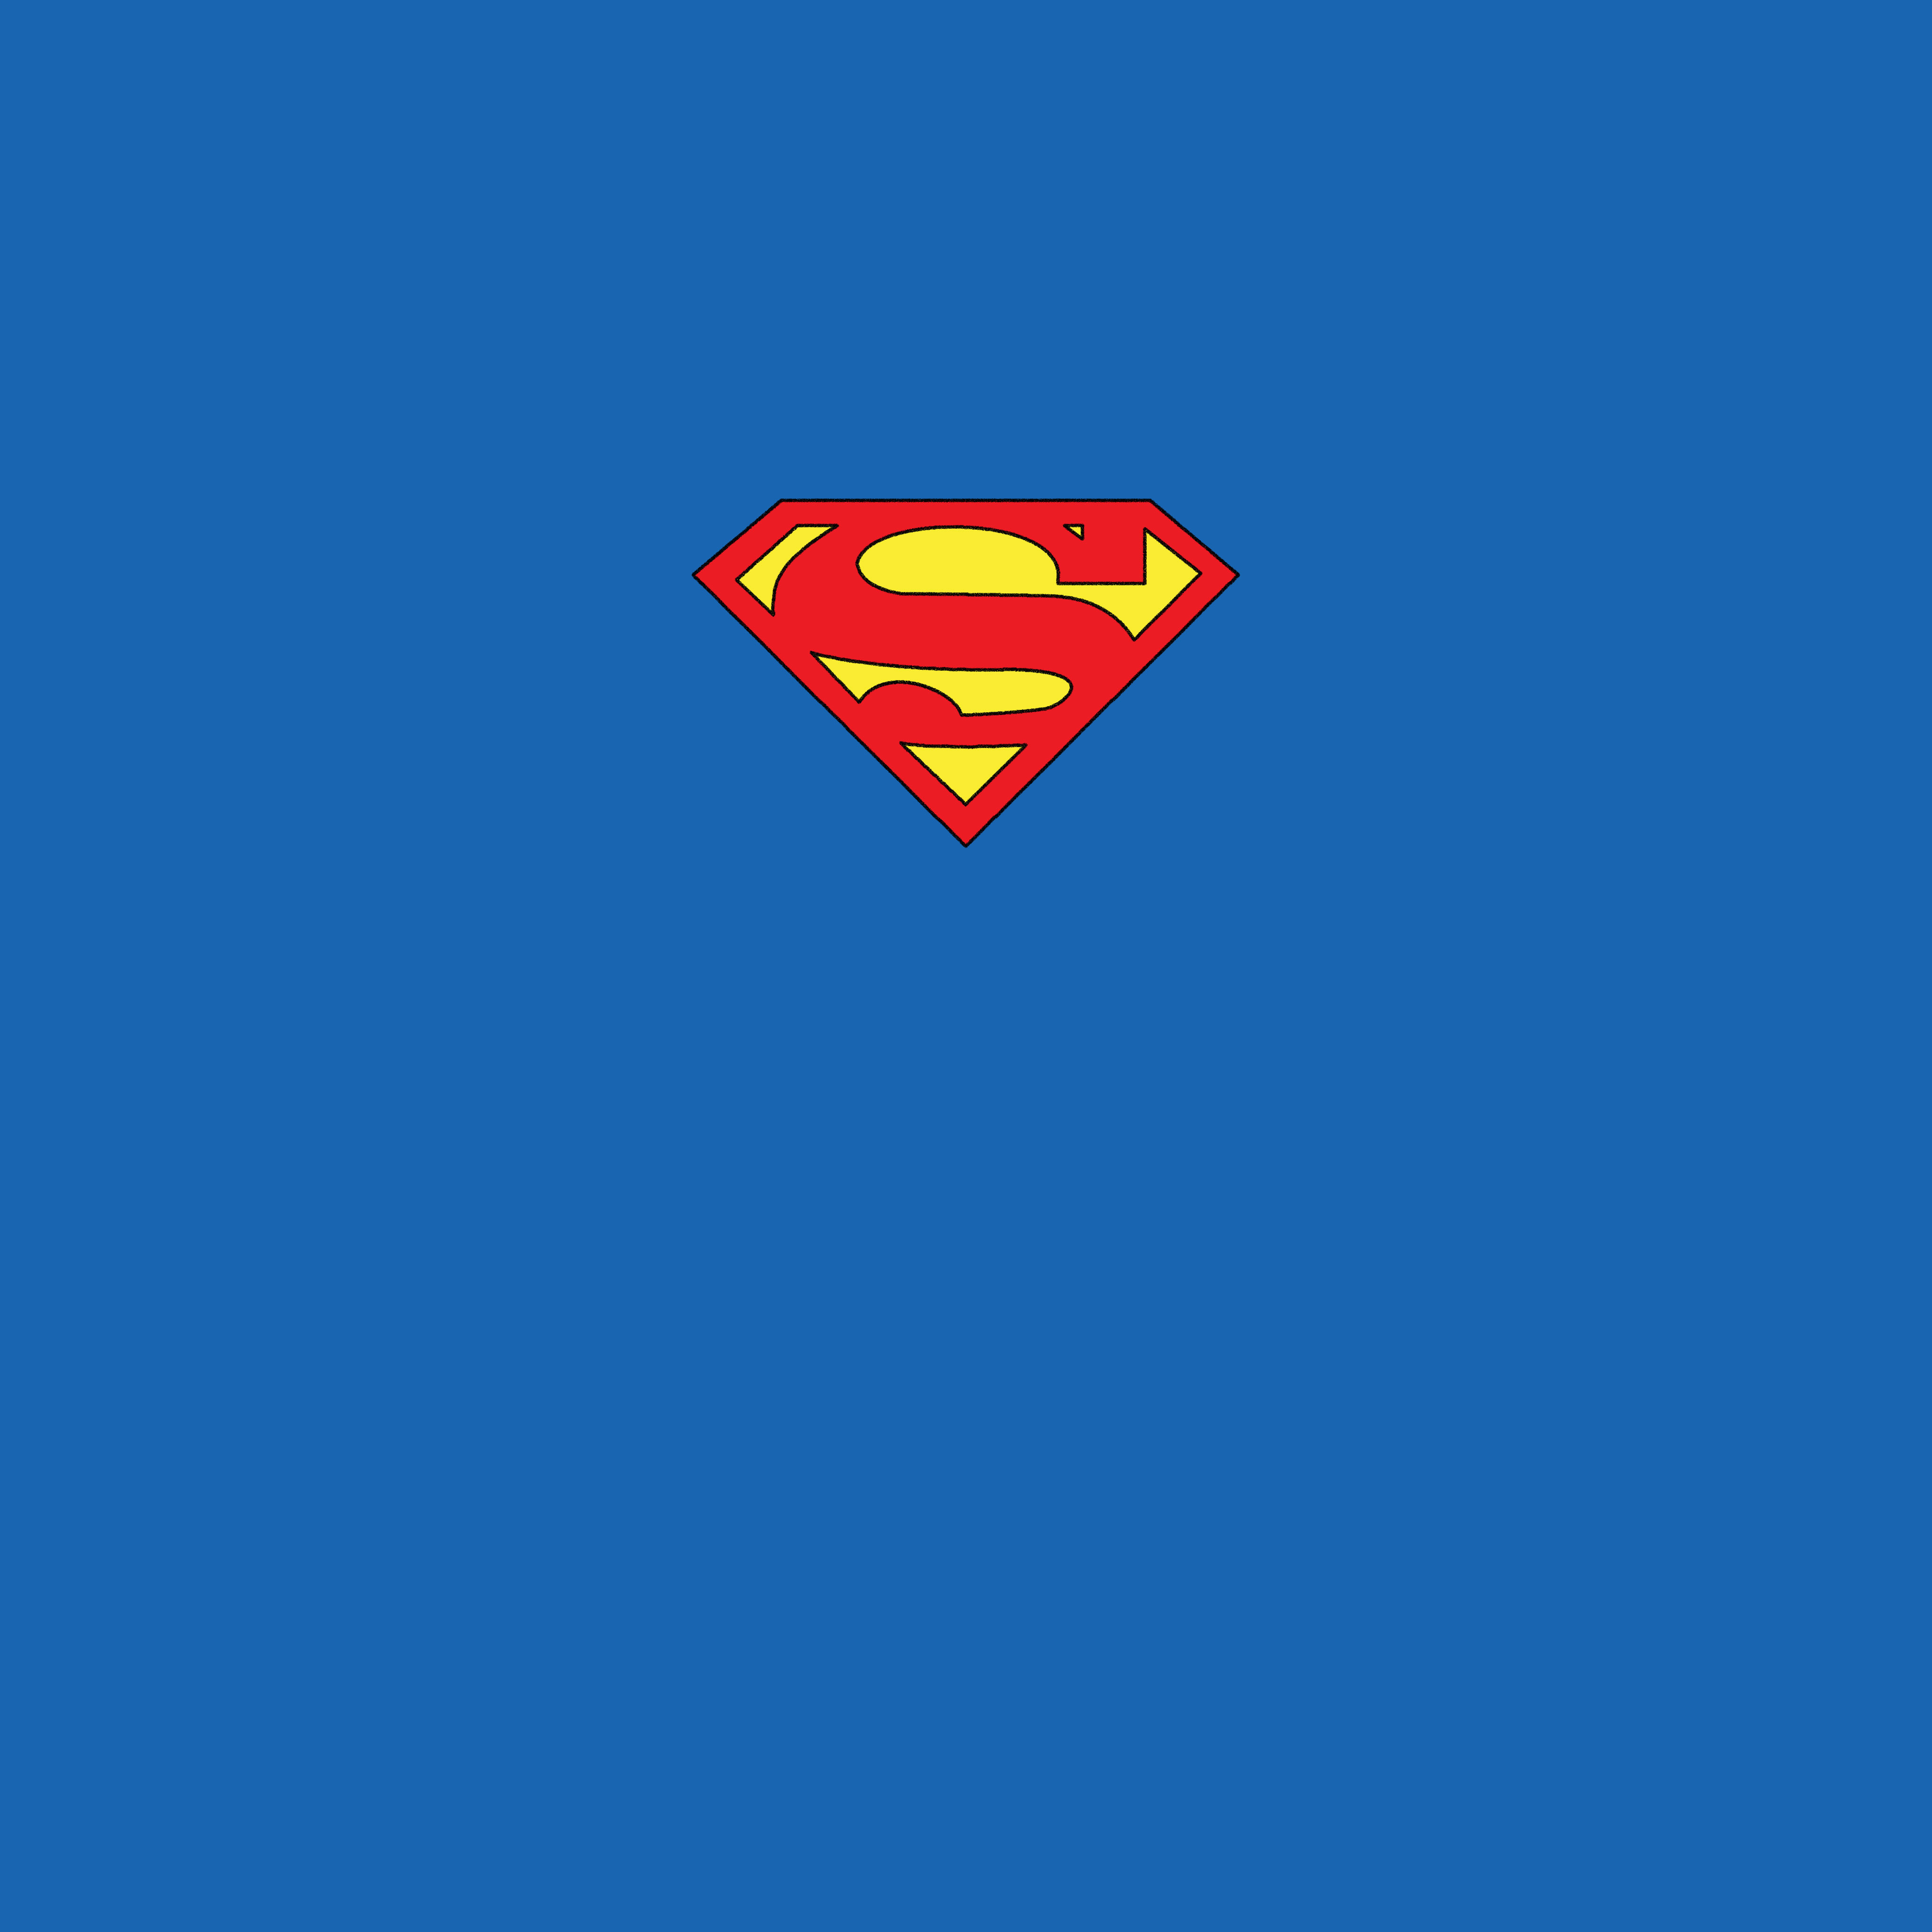
Texture used for the torso of the super suit.
I actually made the S-Shield as a vector illustration in Illustrator a few years ago when I made a piece featuring the 1990’s “Reign of the Supermen” character Steel. So I just had this lying around.
All I did was bring that into Photoshop, place it over the top of the UV map for all the #3 surfaces of the Super Suit. For the other surfaces of the suit, I just used a solid blue square.
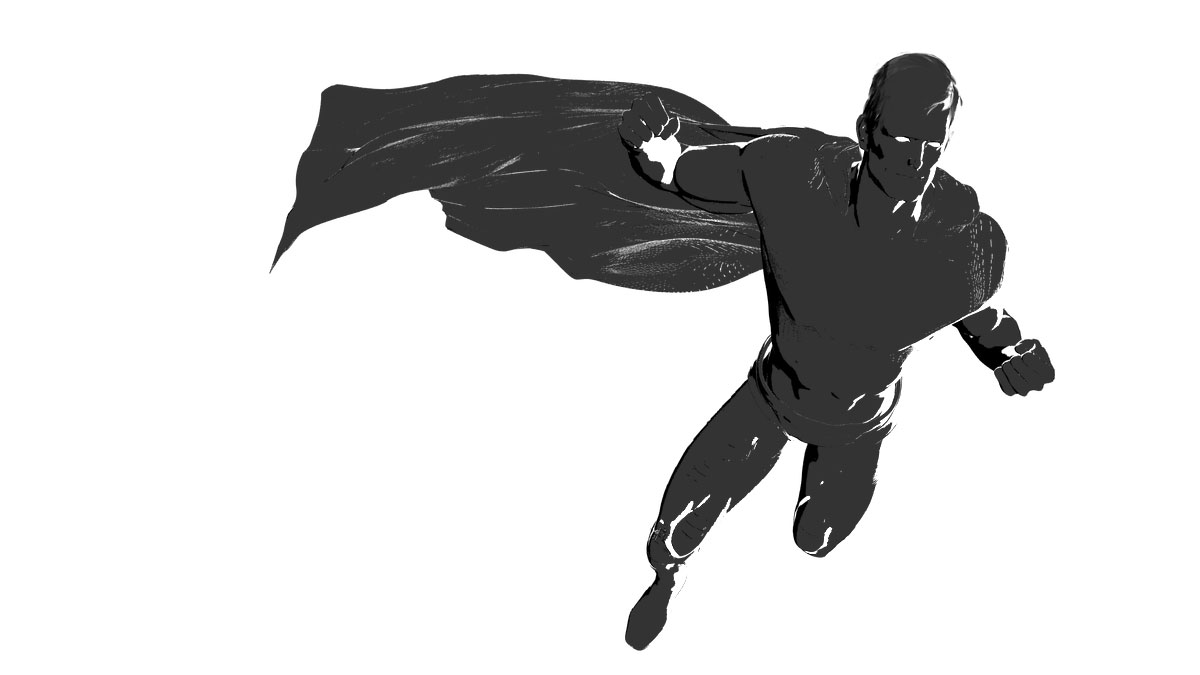
Setting up the figure and loading that texture into the ambient channel gives us a very flat render as a base for the image. Everything is “lit up” here like a light because we’re using the ambient channel. It doesn’t show a lot of depth because it behaves as if everything is basically a light. Since a light doesn’t get covered by shadows it’s a bit featureless. So we need to move to the shadow file to really bring it to life.
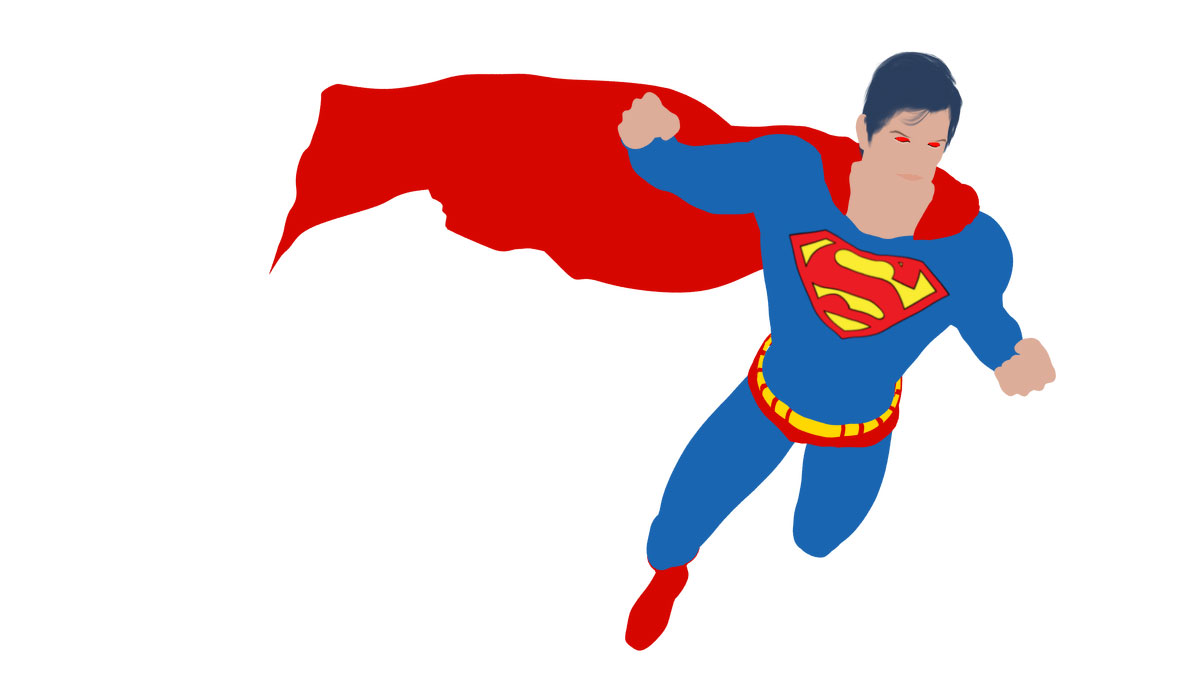
The flat ambient render
Shadow Render
Daz Studio view of the shadow file
So this file kind of looks like something went wrong, but let’s examine it.
All surfaces have had every channel except for Specular and Opacity turned off.
Specular Strength is turned all the way up to 100, with Glossiness turned all the way down to 0, and Specular Sharpness is all the way up to 100%.
Doing this will make the scene in the viewport look gray and lifeless, until we add a few distant lights. Adjusting the intensity and rotation of these lights will allow you to “model” the objects in the scene and define them by using the shadows to bring out the depth of the objects. Here’s what the first render looks like:
First shadow render – shadows are covering chest symbol
Looks like what I expected, but the shadows are actually covering up the chest symbol. We don’t want that, so we’ll go back to our old friend, the ambient channel. I’ll use a mask image to prevent the shadows from covering the chest symbol area.
Here’s the texture that I used for the torso ambient mask:
The ambient mask for the chest symbol
I just turned my original color texture from above into a black and white image. The parts I don’t want to get ambient light are filled with black, and then the symbol is white, so the full intensity of the ambient channel will show here. To help us out with the lines a bit more, I’ve left the lines here where the ambient light will also be blocked. This is going to give us the appearance of lines drawn there.
Back in daz, this means that when I turn on the ambient channel, it will be pure white, and no shadows will cover it. Loading in the image into the Ambient Color channel doesn’t appear to do anything in the viewport, but it will show in the render. If I didn’t have the mask image loaded, that whole torso area would render as it shows in the viewport.
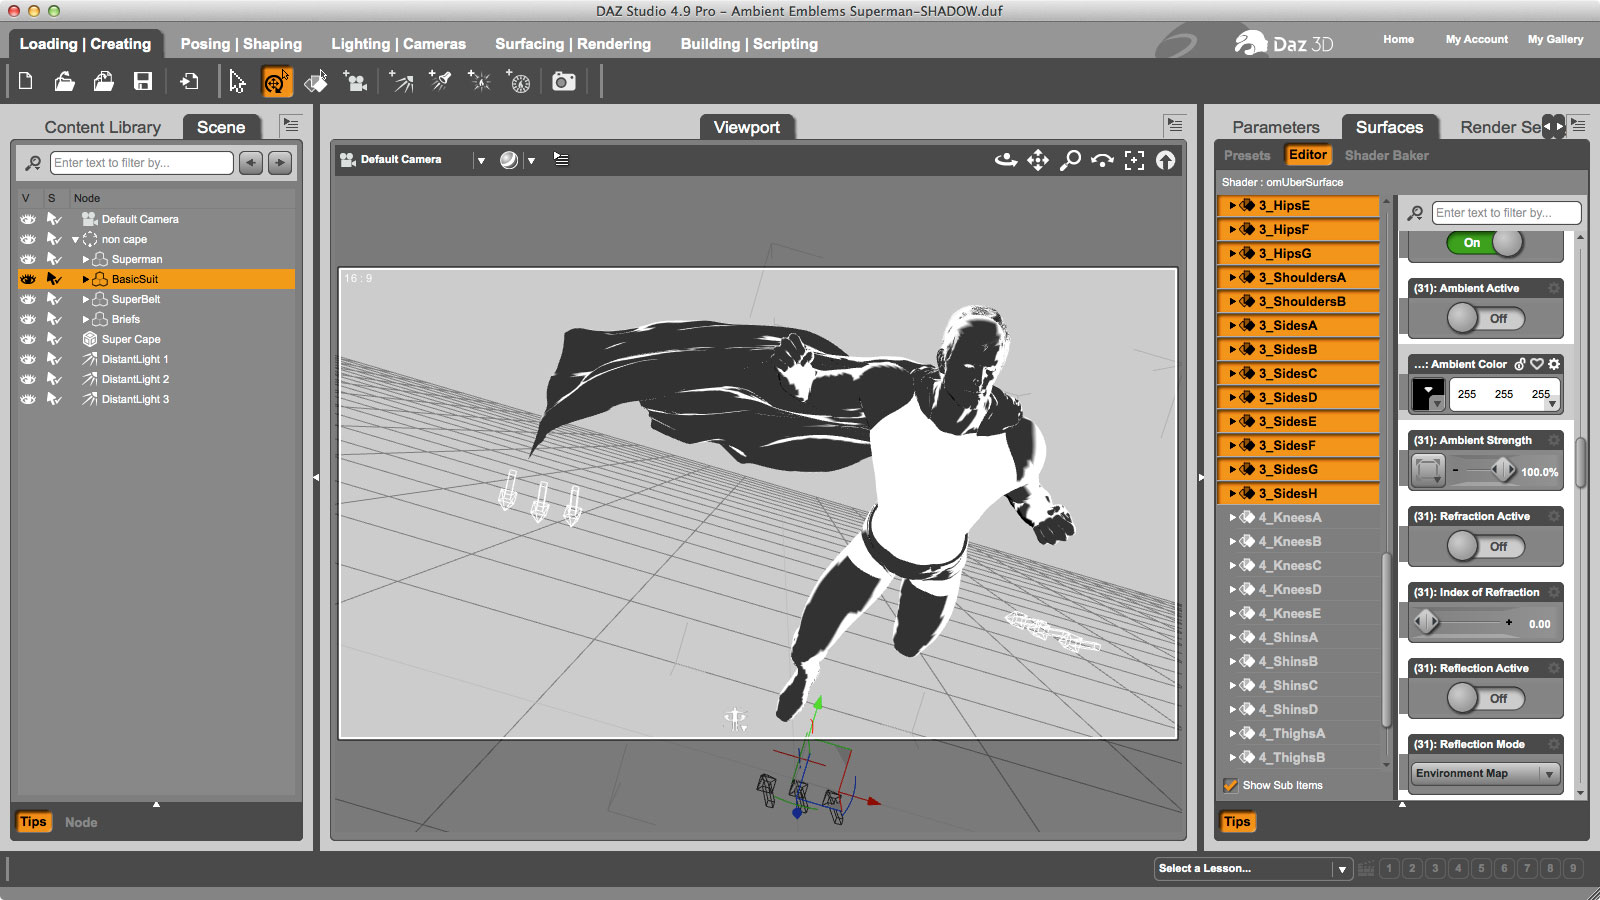
Daz Studio view of the shadow file wit the ambient mask loaded in the ambient channel.
Now when we render, the shadows won’t even cover the chest symbol. There’s just a big hole there where the super symbol can now show through without being darkened by shadows.
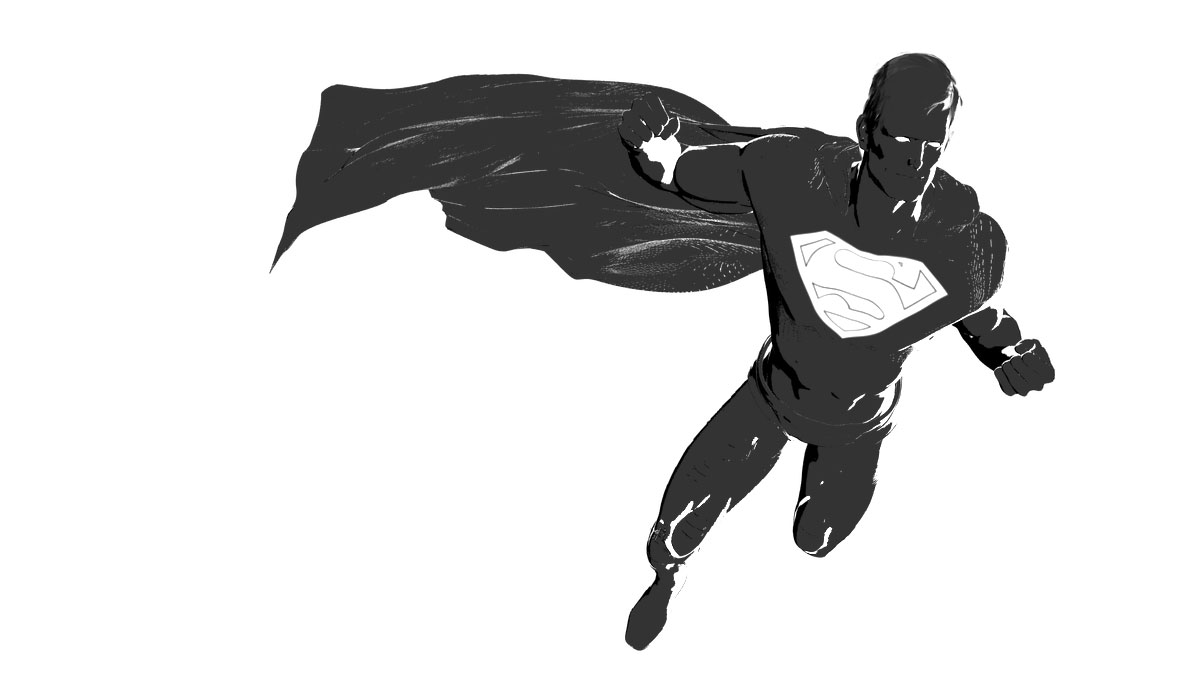
Shadow render with the ambient mask blocking shadows for the chest symbol
Photoshop Compositing
In Photoshop, there’s not much to do as pertains to the figure itself. I just loaded my shadow render on top of my ambient render, then changed the blend mode of the shadow layer to color burn, and that makes the whole difference right there. You can see the shield and the eyes aren’t being covered by the shadows, and that’s really what we were going for.
I noticed that the lines I made on the shield weren’t very pronounced, so to fix that I duplicated the shadow layer multiple times and set them to linear burn. I then grouped them together and added a layer mask to the whole group to limit the effect only to the chest symbol. You can download the psd to check it out for yourselves (psd should open in GIMP as well).
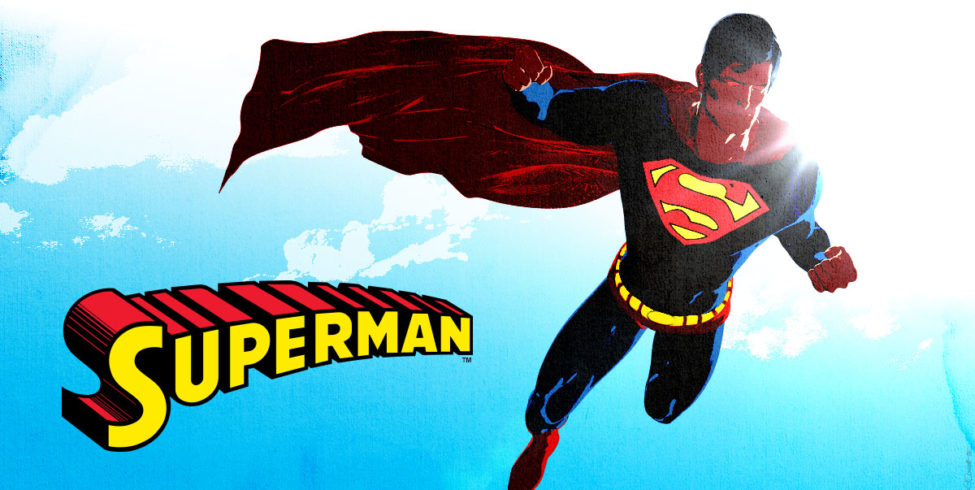
Then I added a sky background and got the Superman logo from logoeps.com to add in here. And that’s really it, guys!
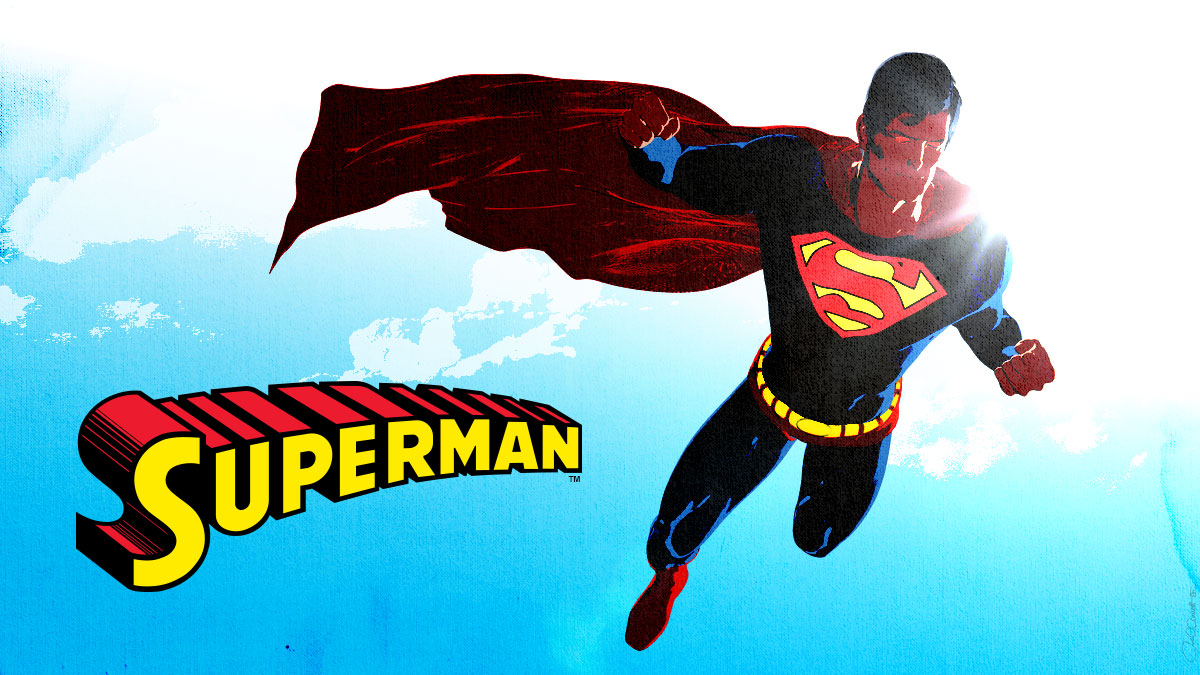
Final composited image.
Link/Props Round-Up
- Photoshop file download (8.8mb)
- Michael 5
- Genesis Supersuit
- Boots and Belt for Supersuit
- Cape for Supersuit
- Genesis K4 Basic Wear – should come with Genesis (I used the briefs for the super-underwear. Next time will likely paint them right on the texture).
Wrap Up
Here’ a few more images where I used this method as examples:


You can use this technique in a lot of ways, not only chest emblems, but glowing eyes, lights and city windows at night. So go crazy with it, and hopefully it’s a technique you can use in your own work. Let me know of any questions in the comments, and definitely shoot me a link if you use it so I can check it out.
With that all said and done, I’m outta here. See you next time!